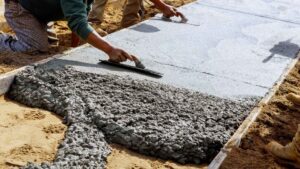
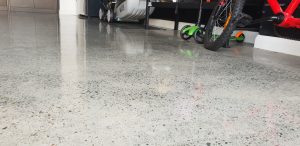
If you’ve been staring at your dusty, stained garage floor and wondering whether you can epoxy it yourself, you’re definitely not alone. It’s one of the most common questions homeowners ask before starting a garage renovation.
The short answer is yes, you can epoxy your garage floor yourself.
The better question is whether you should.
Plenty of DIY epoxy flooring projects turn out great, but just as many end up peeling, bubbling or wearing out within a couple of years. The difference usually isn’t the epoxy itself. It’s the preparation that happens before the first coat is even opened.
If you’re willing to put in the time, use the right equipment and follow the process carefully, DIY epoxy flooring can be a worthwhile project. But if you’re expecting it to be as simple as painting a wall, you’ll probably be disappointed.
In this guide, we’ll walk through what’s actually involved, the mistakes that catch most people out, and how to decide whether a DIY garage epoxy floor is the right choice for your home.
Is DIY Epoxy Flooring Really Worth It?
The popularity of DIY epoxy flooring has exploded over the last few years. Hardware stores now stock complete epoxy kits, YouTube is full of weekend makeover videos, and social media makes it look like anyone can transform a tired garage in a day.
The reality is usually a little different.
Most people choose DIY for one of three reasons:
- They want to save money.
- They enjoy working on home improvement projects.
- They believe it’s a straightforward job.
The first two reasons are completely fair. The third one is where problems often begin.
Applying epoxy isn’t technically difficult. Rolling epoxy across a floor is actually one of the easiest parts of the job. Preparing the concrete properly is what takes the most effort and determines whether the floor lasts two years or fifteen.
It’s also worth thinking about what you expect from the finished floor.
If you’re simply looking to tidy up an old garage that gets occasional use, a DIY kit might give you the result you’re after.
If you’re hoping for the same glossy, seamless finish you’ve seen in premium garages or commercial workshops, you’ll need to understand that professional flooring systems use different preparation methods, commercial-grade materials and specialised equipment that most homeowners don’t own.
Neither option is automatically right or wrong. It simply depends on your expectations, your budget and how much time you’re prepared to invest.
What You’ll Need Before You Start
One of the biggest surprises for first-time DIYers is how much equipment is actually required.
Many people assume they can buy an epoxy kit on Saturday morning and have the garage finished by Sunday afternoon.
In reality, the coating itself is only one part of the project.
Before you even think about mixing epoxy, you’ll typically need:
- A quality epoxy flooring kit
- Concrete degreaser
- Pressure washer or stiff scrubbing equipment
- Crack repair compound
- Diamond concrete grinder or grinder hire
- Industrial vacuum
- Mixing bucket
- Power drill with mixing paddle
- Rollers and extension poles
- Brushes for edges
- Protective gloves
- Safety glasses
- Respirator
- Moisture testing kit
Hiring some of this equipment can quickly add to the overall cost.
Concrete grinding alone often requires hiring specialised machinery that many homeowners have never used before. While it isn’t impossible to learn, there is definitely a learning curve.
This is why comparing the price of a DIY epoxy kit with a professional quote isn’t always an apples-to-apples comparison. Equipment hire, preparation materials and your own time all contribute to the final cost.
Surface Preparation Is Where Most DIY Projects Fail
If there’s one section of this article you should remember, it’s this one.
Almost every failed epoxy floor has one thing in common.
Poor preparation.
People often blame cheap epoxy when the coating starts peeling, but in many cases the epoxy never had a chance to bond properly in the first place.
Concrete might look clean on the surface, but years of use leave behind oil, tyre residue, grease, dust and contaminants that soak deep into the slab.
Simply sweeping the floor isn’t enough.
Neither is giving it a quick wash with a pressure cleaner.
Professional preparation usually includes:
Deep Cleaning
Oil stains, grease and embedded dirt must be completely removed before coating begins. Even small contaminated areas can weaken adhesion.
Moisture Testing
Concrete naturally absorbs moisture.
If excessive moisture is trapped beneath the coating, it can force the epoxy away from the slab over time, leading to bubbling or peeling.
Many homeowners skip this step entirely because they don’t realise moisture is even an issue.
Crack Repairs
Small cracks often become much more noticeable after epoxy is applied.
Repairing damaged sections beforehand creates a smoother finish while preventing future movement from affecting the coating.
Mechanical Concrete Grinding
This is arguably the most important stage.
Grinding removes weak surface material while opening the concrete pores so the epoxy can bond directly with the slab.
Without proper profiling, epoxy often sits on top of the surface instead of becoming mechanically bonded to it.
That’s one of the biggest reasons DIY floors begin lifting after only a few years.
Can You Skip Concrete Grinding?
This question comes up all the time because hiring a grinder can seem expensive.
Some DIY kits suggest using acid etching instead.
While acid etching can improve adhesion compared to doing nothing at all, it generally doesn’t produce the same consistent surface profile as mechanical grinding.
Grinding removes contaminants, smooths imperfections and creates an even texture across the entire slab. Acid etching relies on a chemical reaction, which can produce inconsistent results depending on the age and condition of the concrete.
Professional installers almost always choose mechanical grinding because it gives them the greatest confidence that the coating will bond properly.
If your goal is to maximise the lifespan of the floor, grinding is one area that’s difficult to justify skipping.
Common DIY Mistakes That Ruin Epoxy Floors
Most epoxy flooring failures don’t happen because the product is poor quality. They happen because small mistakes during installation lead to big problems later.
Knowing what can go wrong gives you the best chance of avoiding costly repairs.
Not Removing Oil and Grease Properly
Garage floors absorb oil over many years. Even if a stain looks clean, contaminants can remain deep inside the concrete.
When epoxy is applied over oily areas, it struggles to bond properly, increasing the risk of peeling or blistering.
Applying Epoxy to Damp Concrete
Concrete isn’t always as dry as it appears.
Moisture trapped inside the slab can push against the coating after installation, causing bubbles, lifting or complete coating failure.
This is why professional installers always assess moisture levels before starting.
Skipping Concrete Grinding
As discussed earlier, this is probably the biggest mistake DIYers make.
Without grinding, epoxy bonds to the surface instead of the concrete itself. The floor may look fantastic initially, but once vehicles, hot tyres and everyday traffic are introduced, the coating can begin separating from the slab.
Incorrect Mixing Ratios
Epoxy is a two-part product that relies on precise chemical ratios.
Adding too much or too little hardener can affect curing, leaving sections that remain soft, sticky or brittle.
Always follow the manufacturer’s mixing instructions exactly and avoid guessing measurements.
Ignoring Temperature and Weather Conditions
Australian weather can be unpredictable.
Installing epoxy on extremely hot days shortens working time, making it harder to spread evenly before the product begins curing.
Cold temperatures can slow curing significantly, while high humidity may affect the final finish.
Always check the manufacturer’s recommended installation conditions before starting.
Rushing Between Coats
Patience is essential.
Applying the next coat before the previous layer has cured properly can weaken the entire flooring system.
Likewise, waiting too long between coats may reduce adhesion.
Following the recommended curing schedule is just as important as applying the epoxy itself.
How Long Does DIY Epoxy Flooring Last?
One of the biggest questions homeowners ask is whether a DIY floor will actually last.
The honest answer is that there’s no single lifespan.
It depends on several factors, including the quality of the epoxy, how well the floor was prepared, and how heavily the garage is used.
As a general guide:
- Basic DIY installation with minimal preparation: 1 to 3 years
- Well-prepared DIY installation using quality products: 5 to 10 years
- Professionally installed commercial-grade systems: 10 to 20 years or more, depending on usage and maintenance
Preparation has a much bigger influence on lifespan than many people realise.
A premium epoxy applied to poorly prepared concrete can fail much sooner than a mid-range product installed correctly.
Regular cleaning and avoiding prolonged exposure to harsh chemicals will also help maximise the life of the coating.
DIY Epoxy Kit vs Professional Installation
While both options use epoxy, the similarities often stop there.
| DIY Epoxy Kit | Professional Installation |
| Homeowner completes all preparation | Professional concrete assessment and preparation |
| Basic consumer-grade products | Commercial-grade coating systems |
| Limited equipment | Industrial grinding and application equipment |
| Greater risk of installation mistakes | Experienced installation techniques |
| Lower upfront cost | Higher initial investment |
| Usually no workmanship warranty | Installation warranty often included |
| Lifespan depends heavily on DIY quality | Designed for maximum long-term durability |
Professional installation isn’t simply paying someone to roll epoxy across the floor.
You’re investing in proper surface preparation, specialist equipment, product knowledge and experience that reduces the likelihood of problems later.
How Much Can You Actually Save?
Cost is often the biggest reason homeowners consider DIY.
On paper, it can certainly appear cheaper.
However, it’s important to compare the complete cost rather than just the epoxy kit itself.
A typical DIY project may include:
- Epoxy flooring kit
- Grinder hire
- Industrial vacuum hire
- Cleaning products
- Crack repair materials
- Rollers and application tools
- Safety equipment
You’ll also need to factor in an entire weekend, or sometimes longer, depending on the size and condition of the garage.
If mistakes occur and the coating fails, removing epoxy and starting again can be significantly more expensive than getting it installed professionally in the first place.
That doesn’t mean DIY isn’t worthwhile.
If you already own some of the equipment, enjoy home improvement projects and are prepared to spend the time on preparation, it can still offer excellent value.
When DIY Makes Sense
DIY epoxy flooring can be a good option if:
- Your garage is relatively small.
- The concrete is in good condition.
- There are minimal cracks or oil contamination.
- You have previous DIY experience.
- You’re comfortable hiring and using concrete grinding equipment.
- Saving money is a higher priority than achieving a showroom-quality finish.
For many homeowners, completing the project themselves is rewarding and produces a result they’re genuinely proud of.
When Hiring a Professional Is the Better Choice
Professional installation is usually worth considering when:
- The concrete is old or heavily damaged.
- Significant crack repairs are required.
- Moisture issues may be present.
- You want decorative flake flooring or premium finishes.
- The garage experiences heavy vehicle traffic.
- The floor forms part of a high-end renovation.
- You want long-term durability with minimal risk of failure.
In these situations, professional preparation and commercial-grade materials often provide better long-term value.
Final Thoughts
So, can you epoxy your garage floor yourself?
Yes, absolutely.
For the right homeowner, DIY epoxy flooring can be a rewarding project that delivers a cleaner, more attractive garage while saving money.
The key is understanding that success depends far more on preparation than on the epoxy itself. Taking shortcuts during cleaning, repairs or concrete grinding is what causes most DIY floors to fail.
If you’re confident using the right equipment, willing to invest the time and happy with the level of finish that a DIY project can achieve, there’s no reason you can’t produce a durable floor.
On the other hand, if your garage has damaged concrete, moisture issues or you’re aiming for a premium finish that lasts for many years, professional installation is often the more reliable investment.
Whatever path you choose, focusing on proper preparation from the beginning will give your garage floor the best chance of looking great and performing well for years to come.
Frequently Asked Questions
Find answers to common questions about DIY epoxy flooring, surface preparation, curing times, peeling and garage floor installation.